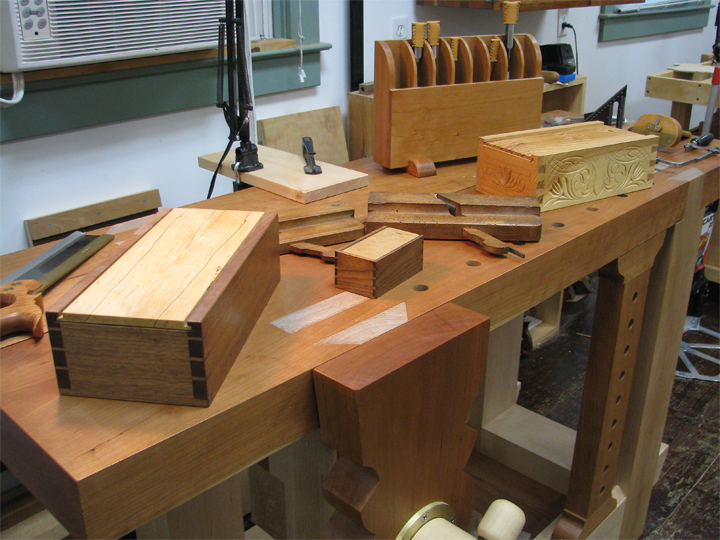
Tuesday, November 13, 2012

Relief Carving: A Novice's Observation

As I learned nearly three decades ago, one of the unexpected benefits of being an art student is that your friends will readily disrobe for you.

Let me rephrase that.

Willing models are always close at hand for the sake of art.

Case in point—my friend Kevin. With his athletic and sinewy physique, it was very easy to envision the skeletal and muscular structure beneath the surface, which made him easy to draw.

His figure (just like everything else in nature) can be broken down into simple shapes. Sketching basic forms first creates volume; adding details later provides interest.

Similarly in carving, if you break down the structure into general shapes—rather than focus too soon on the details—it will provide a solid foundation for your project.

Unfortunately, I'm a gal who "can't see the forest for the trees," so I must force myself to ignore details when I begin to carve.

In art school, we were taught that if you squint, the details are obliterated and you see only basic configurations. We used that technique in typography class in order to determine whether or not characters were well-spaced. It forced us to focus on negative and positive relationships rather than nuances between letters.


Maybe that's why Shaker furniture is so appealing. Their furniture is the "squint" version of the fancier pieces of the age. They still hold up to design scrutiny because they're perfectly balanced, the dimensions are pleasing, the overall shapes are simply correct.

If the squint version of furniture isn't working, it's unlikely that ornamentation is going to save it.

Similarly in carving, if the basic shapes don't seem right, the details probably aren't going to give you the results you want.

This is what I've noticed as I'm trying to get a grip on relief carving. I am not completely able to put this observation into action as I have not yet mastered control over the tools (and may never). But it's an enlightening learning experience.

It reminds me that all the arts share a common thread.

And sometimes those threads wind up on the art studio floor. Thanks, Kevin!

....and Janet, and Roger, and Bob, and Nancy, and Mickie.....

Wednesday, November 7, 2012

Gothic Stool: Part IV

For the gothic stool I'm working on, I plan to chip carve a design on the outside of each leg, carve the handle for the seat, and carve a scene on the front of the stretcher.

I have a ways to go, but here is an update on my progress.

The chip carved designs I'm using are right out of one of Wayne Barton's excellent books. The handle is based on a tiny graphic I found in a book about gothic furniture. The design for the stretcher relies heavily on carved scenes I found on medieval panels.

It was a humbling experience while searching for references for the stretcher. It seems as though every wooden surface from the middle ages had something carved on it. The apparent speed and skill of the craftsmen is mind boggling.

I can't imagine how it would feel to be among a team of carvers that was asked to embellish the entire interior of a church when I can't seem to peddle any faster with this tiny little project I'm working on.

For the relief carving, take my process with a grain of salt. I'm figuring this out as I go along, so if you really want to learn relief carving, you might want to invest in some good books or DVDs from folks who've had training.

Basically, I draw the design, make stop cuts straight down along the outline, use shallow gouges to pare away and level the background, then start on the design.


To do that, I also outline the pencil lines with stop cuts, and then carve away portions that should appear to be further away in perspective. I start with basic shapes and then work back in with finer details. No sense getting too detailed in case you find you need to make certain areas lower as you go along.

Onward....


Wednesday, October 31, 2012

Happy Hallowoodworker!

My Halloween costume as a fledgling woodworker 20 years ago. 

By the look of the handsaw and table saw blade—and the apparent reference material on hand at the time—I had not yet developed an obsession for hand tools. 

I did, however, have a penchant for liquid latex.


Tuesday, October 30, 2012

Priorities

Hurricane Sandy tore up and flooded the east coast yesterday and today, and many folks have long term clean up and rebuilding ahead of them or are experiencing the tragedy of having lost a loved one. Some of those who were in her path had been forced to evacuate and were only able to take necessities with them.

We were in the line of fire and although our house is not in a flood plain, I took precautionary measures due to our neighbor's huge maple tree that looms over the back half of my house and my entire workshop.

The impending 60 mph winds had me a tad bit concerned that the tree, with its full canopy of leaves, would topple in our direction.

At times like this, what would you save? (Aside from the obvious—family and pets.)

My number one priority was my workbench because 1) I love it and 2) I sure as heck don't want to build another one. Ever.

So, I disassembled all the parts and brought them to the front of the house.

Second priority was all the hand tools I had made, followed by any projects-in-the-making. After that, I brought in all the modern hand tools I had purchased.

I was satisfied with that, thinking that insurance would replace any of the machinery and small power tools, but I decided to cover them with heavy plastic tarps anyhow. It wouldn't prevent the tree from crushing the contents of my shop, but if it only damaged the roof, the tarp would keep the rain off my tools.

Two bedrooms were also in the path of the maple tree, but I perused their contents and thought, "meh."

Sandy has passed, we did not lose power, the maple didn't budge, and it's time to put my shop back together.

But while looking at my workbench's legs (that were lying on the floor in my office) and the tools I had laid on top of them, an idea popped into my head of where to stow my saws when I take my bench on the road.

I hope that if Sandy roared through your neighborhood, you fared as well as we did.


Saturday, September 29, 2012

Honing Gouges Video

As I'm working on the carving for my gothic stool, I decided to show you the technique I use to keep my gouges sharp. This is not the only way to hone your tools, it's just the one that I use.

I posted a short write up about this two years ago, but sometimes it's easier to explain in video format.

To view this in HD, click here.

Tuesday, September 18, 2012

Fort Hunter Day

Dan showed how to make a framed
panel by hand.
Two friends and I set up shop at Fort Hunter Day this past Sunday. We had a steady stream of interested folks stop by our tents throughout the day.

I demonstrated chip carving and dovetailing and learned a few things from the experience.

One woman who was a quilter mentioned that a particular knife cut I was making was called "pumpkin seed" in quilting. It's not surprising to hear that there's a crossover between crafts. In fact, many of the same patterns found in chip carving are also found in fraktur paintings.
Alan did some carving and
sharpened handsaws.

Another woman with an eastern European accent asked where I had seen the design that I had carved on my gothic stool. I told her it was from a book, and she said that she recognized the pattern. "Is traditional Transylvanian rosette," she said.  How cool is that??

One guy stopped by and asked me (tongue-in-cheek), "Where's your husband? He does nice work!" From that I learned to not set up my booth next to my friend (Dan) who had no doubt put him up to it.

My Transylvanian Gothic Stool.
We borrowed the spill plane that I  had made for the York Agricultural & Industrial Museum and shaved spills for the kids. After we explained what they were used for (the original matchstick), we told them that they were also Harry Potter wands. It was a big hit.

I had two boxes sitting near one another in my booth. One was a walnut and spalted maple sliding lid box with fine, thin dovetails. The other was a chip carved pine box with chunky, awkwardly large dovetails.

Without exception, every visitor who noticed the boxes reached for the chip carved box. Not one person commented on the walnut box. I think that most people look for furniture with dovetailed drawers because they've been told they're a sign of a well-made piece, but perhaps only another woodworker actually admires dovetails.

It seems to me that most non-woodworkers will notice ornamentation or interesting figure or a nice finish, but not joinery.  It makes sense.  We might not know what makes a good quality quilt, but we would certainly notice the fabric and colors.

We set up our booths at 7:15 that morning and broke down our tents by 6:30 p.m.  We were completely exhausted. The woman in charge of our area asked if we would consider doing it again next year and I said we'd think about it.

Yesterday, a friend sent me photos that he had taken that day. When I saw the last one, I forgot all about how tired I had been and decided right then I'd do it again. How could I say "no" to those faces?

----------
The three photos from Fort Hunter were taken by Robert Newmyer. Thanks, Bob!

Thursday, September 13, 2012

On The Road Again

John Harris/Simon Cameron Mansion
Greta is going on the road for the third time since she was completed in April.

Last week, I demonstrated chip carving at the John Harris/Simon Cameron Mansion. This Sunday, I'll dovetail candle boxes at Fort Hunter Day along with two friends—one of whom will make Shaker oval boxes, and the other will build frame and panel doors with hand tools.

Greta's still plenty gappy.
You might wonder how Greta's holding up and breaking down with the change in humidity. Surprisingly, she's hardly moved at all. That gap between the two top boards to allow for wood movement has only shrunk about 1/32".  The only other difference is that the top boards have gotten a wee bit thicker—about 1/64".

Other than that, she still knocks down and goes together just fine.

The benchtop is a tad thicker.
We'll be outside this weekend in the grass, so I thought of a way to ensure that Greta's feet won't wick up any moisture from the ground: Duct tape.

I'll line the bottoms of her legs with blue painter's tape (which isn't as sticky), and then put duct tape overtop of it. Should make for a good moisture barrier.

And, I learned a couple things from last week's demo that I'll keep in mind for this Sunday:
1) You can never have too many packing blankets.
Packing for Fort Hunter.
2) I talk too much.

The latter of the two was revealed to me by my partner who said that I should cut more, talk less.

Not a problem. I'm bringing duct tape, remember?

Saturday, September 8, 2012

Gothic Stool: Part III

Just like everything else in woodworking, shaping your piece can be done with a number of different tools.

Generally, I rough-cut pieces on a bandsaw and then finalize the shape with chisels, gouges, spokeshaves, rasps, files, sandpaper wrapped around dowels, and a lot of time.


I haven't found a quick way to shape pieces.  An oscillating spindle sander can come in handy, but you wouldn't be able to reach tight corners and you'd still need to do final sanding. 

However, just like sanding, you can speed up the process by starting with your most aggressive tools—coarse rasps and files, deep cuts with chisels and gouges—to remove the bulk of the waste. 


Working under a raking light reveals parts that need more attention, and using a square to check that your edges are perpendicular to the faces ensures that both sides of your piece will be identical.


After I shaped the legs, I trimmed the tenons that pass through the seat. At this point you have a workable stool.

Ah, but what good is a stool without a little carving?