Saturday, January 29, 2011

Short Bench Support

I have lots of excuses for why I haven't built a workbench to replace my 4.5'-long shorty: too many good designs on the internet vie for attention; Chris Schwarz keeps writing new bench books with more information to consider; good ol' fashioned lethargy rears its slothful head; and I don't have enough space in my shop to build the length of bench I *should* build.

But thanks to Swedish illustrator Carl Larsson, an artist born in 1853 who captured family life and bucolic settings in watercolor, I may have exhausted the usefulness of the last excuse.

Larsson's painting of a carpenter at work in his shop depicts one way to get around the inconvenience of a too-short workbench when working with a long board. The carpenter uses a stool that's the same height as his workbench as a support. And instead of planing the board along the length of the bench, he planes into the bench and uses the sash as a stop.

The board that's being planed is thick enough not to flex under pressure, but what happens when this method is used to plane a 4/4 board? My guess is the unsupported middle would flex, which would compromise its flatness.

One way to support the middle is to build a roll around shop cart with hinged wings and locking casters. Because the wings add more length to the top when extended, the cart's footprint can be small—a benefit to a small shop. Add a couple shelves beneath the top, and you have a very useful shop accessory.

The last image of a young Jesus with his carpenter father shows a small, but sturdy workbench in what appears to be a room with ample space for a longer bench.

Could be this was a popular style of workbench used when this painting was made. Could be there weren't enough tall trees available for lengthy lumber.

Or maybe the artist thought Joseph was just...I don't know. Lazy.

Sunday, January 23, 2011

Chemistry-Schemistry

A friend posed this question on facebook recently: What advice would you give your 14 year-old self?

I'd tell myself: Pay more attention in History, Geometry, and Chemistry. But, yeah, you're right about Home Economics. It is just a bunch of malarkey which you'll eschew later....big time.

The only reasons I passed high school Chemistry with Mr. L, the instructor, were because my older brother aced every test (including the first one which tested your current knowledge of the subject) and was therefore well-adored by Mr. L; and he knew my mom, who was a substitute teacher.

Oh, and if you were female and gave Mr. L a hug every time you saw him, you'd pass.

Bring it on, big guy.

But, had I paid more attention in class, I would already understand properties of metal. Instead, I'm studying up on it like crazy so I can use it to gussy up my shop-made tools.

First on my list is to make a level. I bought four at the Brown Dealer Show and Auction yesterday—three for inspiration and one to tear apart.

And I bought five Swiss-made gravers. I was so desperate to try them on brass when I got home, I used the doorknob to my workshop.

The levels include: Stanley Rule & Level Co., 1896, cherry, 30"; E. Preston & Sons, (no date, but probably c. 1900), rosewood 24"; Davis & Cook, 1886, mahogany, 24"; and one we shall refer to as "donor."

By the looks of these, at least some levels secured vials in place with plaster, and better ones included adjustment screws. I'll learn more once I receive Don Rosebrooks' book about American-made levels.

I ordered a sheet of brass from McMaster-Carr. According to their site, the brass listed as Alloy 353 is a good choice for engraving.

In my research, I found that brass is an alloy of copper and zinc. "Alloy" refers to a metal consisting of two or more materials, one of which must be a metal.

But then, you probably paid attention in class and already knew that.

Saturday, January 15, 2011

Catharine Kennedy: Engravin' Maven

Wood and metal go hand in hand. We're surrounded by the combination through the tools we use—try squares, handplanes, chisels, to name a few. And as woodworkers, it's necessary for us to learn some things about working with metal—from sharpening plane irons, chisels, and scrapers to making blades and hardware.

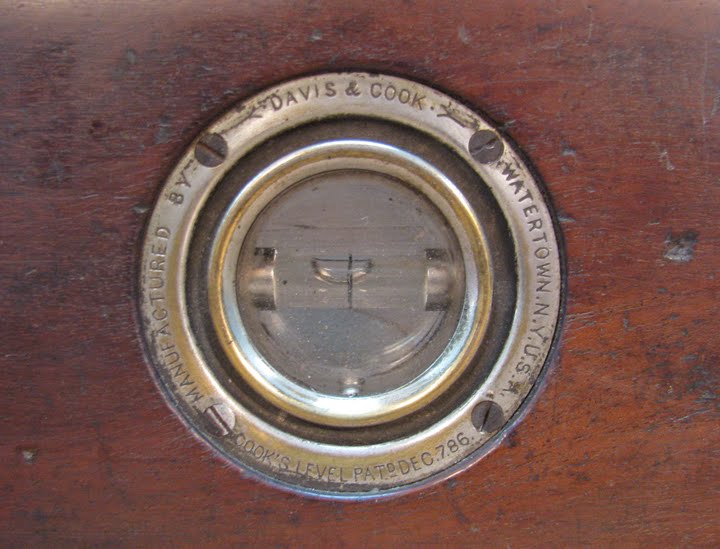
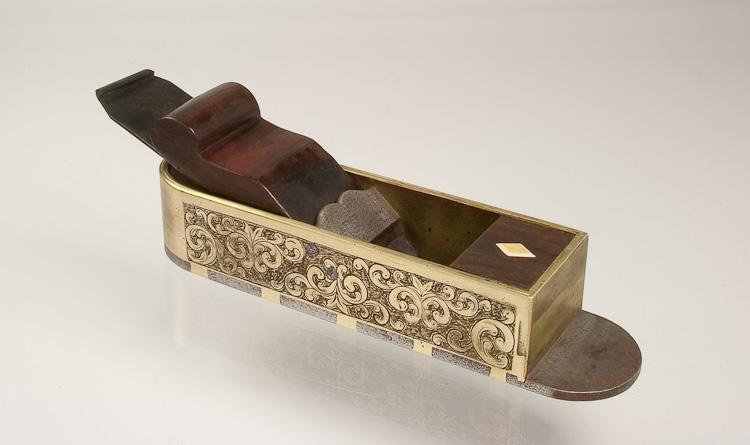
But metal isn't just a utilitarian companion to woodworking. We see how brass and steel, engraved with elaborate designs, can turn an ordinary tool into a piece of usable artwork. Many of us appreciate the unique pieces found in collections, like John Sindelar's.

After WIA, and having seen John's traveling display, I became interested in learning to engrave metal for my own projects. Then, a couple months ago, I was introduced to Catharine Kennedy by way of Gary Roberts of the Toolemera website.

I was gobsmacked by her talent for transforming average-looking tools into real beauties. So, I contacted her to learn more about her and her work.

Catharine first became interested in woodworking through a 4th grade class in a private school in Chicago. After college, she became a carpenter, and later became the lead woodworker at the Hancock Shaker Village in Pittsfield, Massachusetts.

Did she ever get any flack from visitors for being a female woodworker? Only from people who didn’t care about woodworking, she says. “The folks who were really into building and tools were absolute joys to be around and to share what I knew.”

Woodworking is still one of Catharine’s interests—it provides a nice break from the high level of precision and tight tolerances required in engraving.

So how did she get started in working with metal? She was demonstrating woodcarving at a county fair and met another demonstrator who was making long rifles. She traded him a sign for lessons in engraving, and her interest “ran amok from there!”

She started metalworking with hammer and chisel, but moved quickly into using power-assisted gravers. “It's still MY hands and eyes doing the work” she says, “very much the same as a lathe is a power-assisted hand tool.”

Round objects are the biggest challenge to engrave and require lots of practice. Catharine prefers to engrave flat objects such as handplanes, knives, and machinist squares, but also likes to engrave ferrules for chisels.

Catharine studied with master engravers who taught the craft based on traditional scrollwork from the 19th-century—the type of artwork found on firearms, knives, and architecture. You can see that influence in her designs in the way handplanes in her care come to resemble the antique lovelies we adore.

So, what other crafts interest Catharine? Basket-, soap-, and candlemaking, stonecarving, blacksmithing, spinning, weaving, and knitting are all things she learned while employed at the Hancock Shaker Village. “If it’s a handcraft, I’m interested!”

If you’d like to talk with Catharine about embellishing your brand new Lie-Nielsen or your grandfather’s Bed Rock #601 , you can contact her at catharine@catharinekennedy.com.

Visit her websites here and here (the second one is not fully operational yet).

And if you’re interested in finding out more about engraving, Catharine suggests becoming a member of online forums (here and here) and taking online classes (here and here).

-----------------
*All photos are credited to and the property of Catharine Kennedy.

Saturday, January 8, 2011

Taking the Stress Out Of Meditation Benches


Meditation benches are made up of three boards. How hard can they be to build?

That's what I thought. And by the time I was building the third one—and had made lots of mistakes on the first two—why, it wasn't difficult at all.

I decided to make benches for my partner and brother, who are both into Buddhist philosophy.

These types of low stools are canted forward, and the person tucks his or her legs beneath the bench, which makes their back perfectly straight. They're also surprisingly comfortable.

I wanted theirs to be able to knock-down for easy transport to retreats, and be stable enough that they wouldn't take a tumble while meditating with their transcendental buddies.

So, I decided on mortise and tenon joinery.

The seat needed to be thick enough to support the legs' tenons, and the legs needed to flare at the bottom and angle outward to provide stability.

Which meant compound angles. ew.

Therein lies the stress, at least for me, a geometry challenged individual.

I made a prototype in pine to sort out the trouble spots, then set to work on the two benches—one in cherry (finished) and the other in walnut (in progress).

My partner wanted the sanskrit symbol for "Om" carved into her bench (shown above), which was the easiest part of building the benches.

The photo montages show you how I made them, along with basic dimensions, in case you'd like to make one for the granola head in your life.


The seat is 1.125" thick and the legs are .875" thick. I bought a seat cushion (optional) with velcro straps from here.

If you have any questions, shoot me an email. I'll be happy to help make your meditation bench building process as stress free as possible. Namaste, peeps.

Saturday, January 1, 2011

How I Spent The Holidays

Ahhh, back from a nice, two-month blogcation.
But don't think for one minute that I didn't keep busy during my time off.

I got plenty done. P-L-E-N-T-Y.


Music: "You're the Cream in My Coffee" by Colonial Club Orchestra