"Quick" turned into "Unnecessarily Complex"—a phenomenon that all woodworkers can relate to.
 For example, I added quirk bead moulding along the edges with scratch stock (and had to make the scratch stock first). And rather than glue up four thin boards as a solid piece for the bottom, I decided to shiplap and bevel the individual boards.
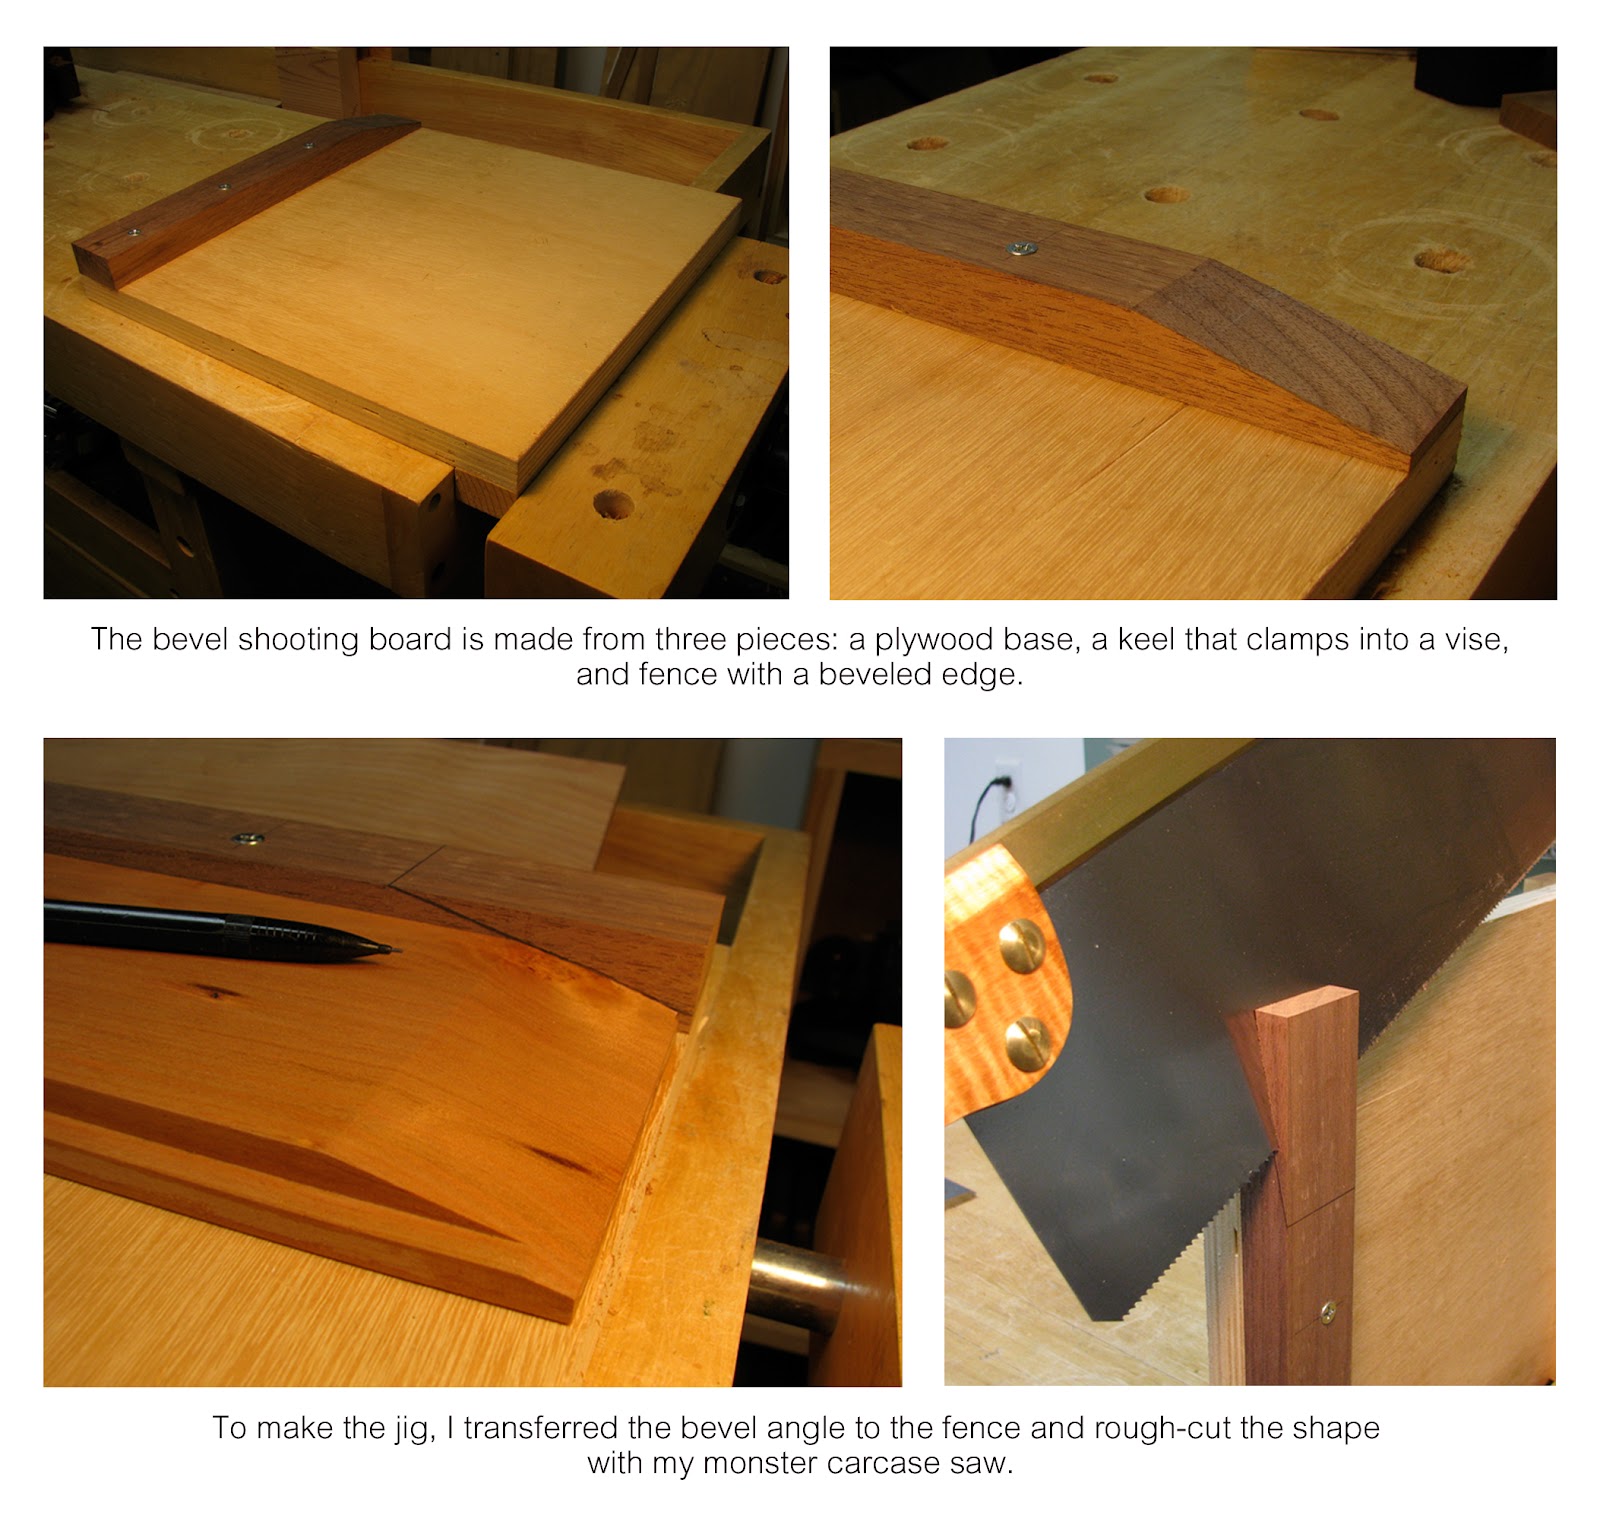 The four separate boards look okay inside the box, but the bottom looks a little odd. Either one glued-up, beveled board or two sets of beveled boards with shiplap would have looked nicer.
Finding a way to hold each board securely while planing the bevels was tricky. So, when I finished the boards for this box, I decided to build a shooting board so that the next storage box will move along more quickly (in theory).
There is nothing fancy or clever about my shooting board. It's comprised of three pieces: plywood for the base, scrap for the cleat, and squared-up piece of hardwood with bevel for the fence.

I used one of the boards that I had already beveled as a template for the fence. Then I used a carcase saw to remove the majority of the waste from the bevel.
I attached the fence to the baseboard with screws, and used a handplane to finish the bevel.
To use the jig, lay your workpiece alongside the fence with the ends aligned, and mark the bevel with a pencil. Transfer the marks to the top, sides, and front edge of the workpiece so you can easily see the waste area.

Use a handsaw to remove the bulk of the waste, then push the workpiece against the fence, and plane across the grain until you are close to your pencil marks.
At this point, slide the workpiece forward and plane with the grain until you reach your pencil marks.


