Tuesday, January 29, 2013

Horned Smoother Part VII

Making this plane is proving to be an excellent learning experience.

It didn't work all that well at first—shavings were getting stuck near the mouth and those I pulled free were accordianed.

I took a class years ago where we made a panel raiser. And while, after four days, we learned how to lay out the lines and flatten a bed, and everyone left with a working plane, we didn't learn (or at least I wasn't paying attention at this point) why it worked.

So when my smoother wasn't working well, I had figure out why.

First, I reckoned that because the plane is high angle, the throat needed to be opened up. This meant changing the upper angle of the throat from 55º to 62º (an arbitrary number), which in turn made the wear more shallow.  And that meant the shavings had a shorter distance to travel through the narrowest section of the plane, plus I could reach stuck shavings more easily.

I started fiddling around with the scrolls at this point, but just ignore them until the next post.

Before tweaking.
Next, I had an epiphany. It's a no-brainer, but it hadn't really dawned on me until now: a full-width shaving needs an exit path—from mouth to top of plane—that equals a full-width shaving (don't say it....I killed too many brain cells in the drinking days of my youth).

That meant tapering the thin walls of the abutments (that hold the wedge in place) from 1/4" at the top of the plane to zero, and well in advance of the mouth.  It also meant that the wide walls of the abutment had to taper from the wedge toward the front of the throat and along its entire length.
After tweaking.

After that, the long arms of the wedge needed to be shortened so they matched the length of the abutment. I also shaved a steeper angle on the arms to provide more clearance for shavings.

One other thing--I made the wear as smooth as possible. It seems as though even small bumps or rough spots will snag a shaving.

Every day that I learn something new is a good day indeed.

*You may notice that the mouth opening is awfully large. I'll add an insert later on to tighten it up.

Friday, January 25, 2013

Horned Smoother Part VI

I employed various chisels and files, and worked in from the top and bottom of the plane in order to open the mouth.  It can take awhile because you need to be sure that all surfaces are as flat as possible. 

I found it a little too iffy to cut the final angle of the abutments by following the pencil lines that I had marked on the outside of the plane. So I cut a 12º wedge from a thin board to use as a pattern to mark the angle on the inside of the plane. 

After the abutments were cut to shape, I rough-cut a full size wedge on the band saw and cleaned it up with a plane. The fit of the wedge needs to be spot on in order to hold the blade in place, so there is a bit of checking, tweaking, and rechecking involved.

Once the wedge is properly fitted, some of the lower portion needs to be removed in order to provide a clear exit for shavings.
Ouch.


At this point you have a working, but extremely painful to use, high angle smoother.

Tuesday, January 22, 2013

Horned Smoother Part V


If you're making one of these planes along with me, here are some errors you can avoid.

When drilling into the mouth to open it up, follow the angle of the bed line.

I forgot to do this and instead drilled between the layout lines that marked the bed and the lower portion of the throat (below the break angle, referred to in my books as the "wear").

After drilling the third hole in a row, I suddenly remembered why I should be following the bed angle.

I had drilled right into the lower part of the abutment that keeps the wedge in place—thus blowing it out—and also into the side wall of the abutment. I also drilled above my break angle.

Nothing a few carved pegs can't fix.

You will see these mistakes when the plane is finished, but I don't mind. It will be a good conversation piece and it fits the rustic, craftsperson-made look.

The other thing I forgot is that it's best to keep the front of the throat flat until all your angles are cut—before you start carving any curves. It's much easier to mark the location of the break angle on a flat surface.


Saturday, January 19, 2013

Horned Smoother Part IV


With pencil, I outlined the shape of the throat, scrolls, abutments, cheeks, and bed. Then I started chopping.

Here are progress shots along with descriptions. 

The result after roughing out the
waste with a mortising chisel.
After this, I'll open the mouth, cut the area below the break angle, and finalize the angle of the shallow walls of the abutments (the parts that hold the wedge in place).


Tuesday, January 15, 2013

Horned Smoother Part III

Here is the layout for the throat, mouth, bed, abutments, and cheeks for my plane.

I referenced two books: Wooden Planes and How to Make Them, by David G. Perch and Robert S. Lee; and Making Traditional Wooden Planes, by John M. Whelan.


The two books are slightly different in their approach and presentation, and I made some slight revisions to suit my plane—so don't take my layout as gospel. If you can get ahold of some old wooden planes for reference, it would be helpful to you.


The pencil marks in the photos are pretty light, so I included two images (at right) with clearer layout lines and angles.

I also added images of the little coffin smoother (last image) that I made awhile ago so you can see the physical shape of the throat and abutment.

The lines on the blank that are at the very front and back represent cutoff lines (for the final length).


Monday, January 14, 2013

The more I learn...

.....the more I realize how very little I know.

In my two most recent posts, readers corrected me on a few points. As well they should.

Point one: when viewing the side of a handplane, the grain should run downhill from toe to heel.
Point two: always use quartersawn stock when making a handplane if you want to avoid seasonal movement (across the width).
Point three: blokschaafs do not have horns. (Hence the name change to my project)

This got me thinking about whether or not I should write about my handplane project since I am not an expert and might mislead someone who is thinking about making a plane.

And then I remembered a conversation that went around the blogosphere many months ago about the misinformation that is sometimes provided to the public through blogs, podcasts, and other venues that are used by those of us who are not professionals.

I mainly steered clear of that conversation because I believe that both sides of the argument are correct: yes, there is misinformation "out there" and yes, non-professional woodworkers do provide a worthwhile service to our community. If nothing else, we keep the conversation going.

I have been called out on a couple other occasions and because of that and other suggestions from readers, I've altered a few ways I do things in woodworking. And I'm grateful for it. I do not have a big ego and welcome criticism.

Writing this blog has made me a better woodworker. You guys have kept me on my toes and your support, advice, and enthusiasm have been the catalysts that have prodded me to try new things. I never would have made a number of things in the last five years if not for you.

Folks over the years have emailed and said very nice things about my blog. Their perception is that I give a lot to the community. The reality is I get a lot from the community—friendship, knowledge, advice, and encouragement.

So for selfish reasons, I'll keep blogging.

And now, here is a picture of my dog in order to make an otherwise dreary blog post a little more "Rosie."

Friday, January 11, 2013

Horned Smoother Part II

Before cutting up the chunk of cherry that I'm using for the horned smoothing plane, I consulted Philip Edwards of Philly Planes about grain orientation.

I had read that it's best to put the sapwood on the sole and the heartwood on top, but I wanted an expert's opinion.

Philly confirmed that he orients his planes this way, although he has seen antiques that were made heart-side-down and which seem to work fine.

First, the best wood is quartersawn. I did not use the correct section of the log in the photos (I used the flatsawn portion), so my plane will move across the width. When looking at the end of a plane (the heel or toe), the grain should be horizontal, not vertical. With seasonal movement, it's okay for the plane to get taller or shorter, but thinner in width can be a problem because the blade can become locked into the body of the plane. There may be other reasons for running the grain horizontally, but this is the one I know.*

In order to get the optimal grain orientation for my plane, the blank had to be sawn from the cherry at an angle.

I removed adjacent corners with an axe to create 90º angles, and cleaned up the faces with scrub and smoothing planes.

After that—just to be sure the blank was dead-on square—I used my power jointer and planer.

*A reader contacted me to let me know that this paragraph is incorrect—I did not say that your wood should be quartersawn in order to minimize seasonal movement (I've since added that bit). But just to avoid any misinformation, please have a look at the Old Street Tool site (formerly Clark & Williams) where they explain grain direction. 

Blokschaaf Part I

There's a blokschaaf (or six) in that
chunk of wood.
Ah, the thrill of starting a new project.

It's like the beginning of a new romance (except that your project won't stand you up or flirt with other lumber. It may, however, break your heart), and it's one of the most exciting aspects of woodworking.

It's one reason we woodworkers typically have five or more projects going on in our shops at the same time. (My gothic stool that's sat untouched for over a month comes to mind.)

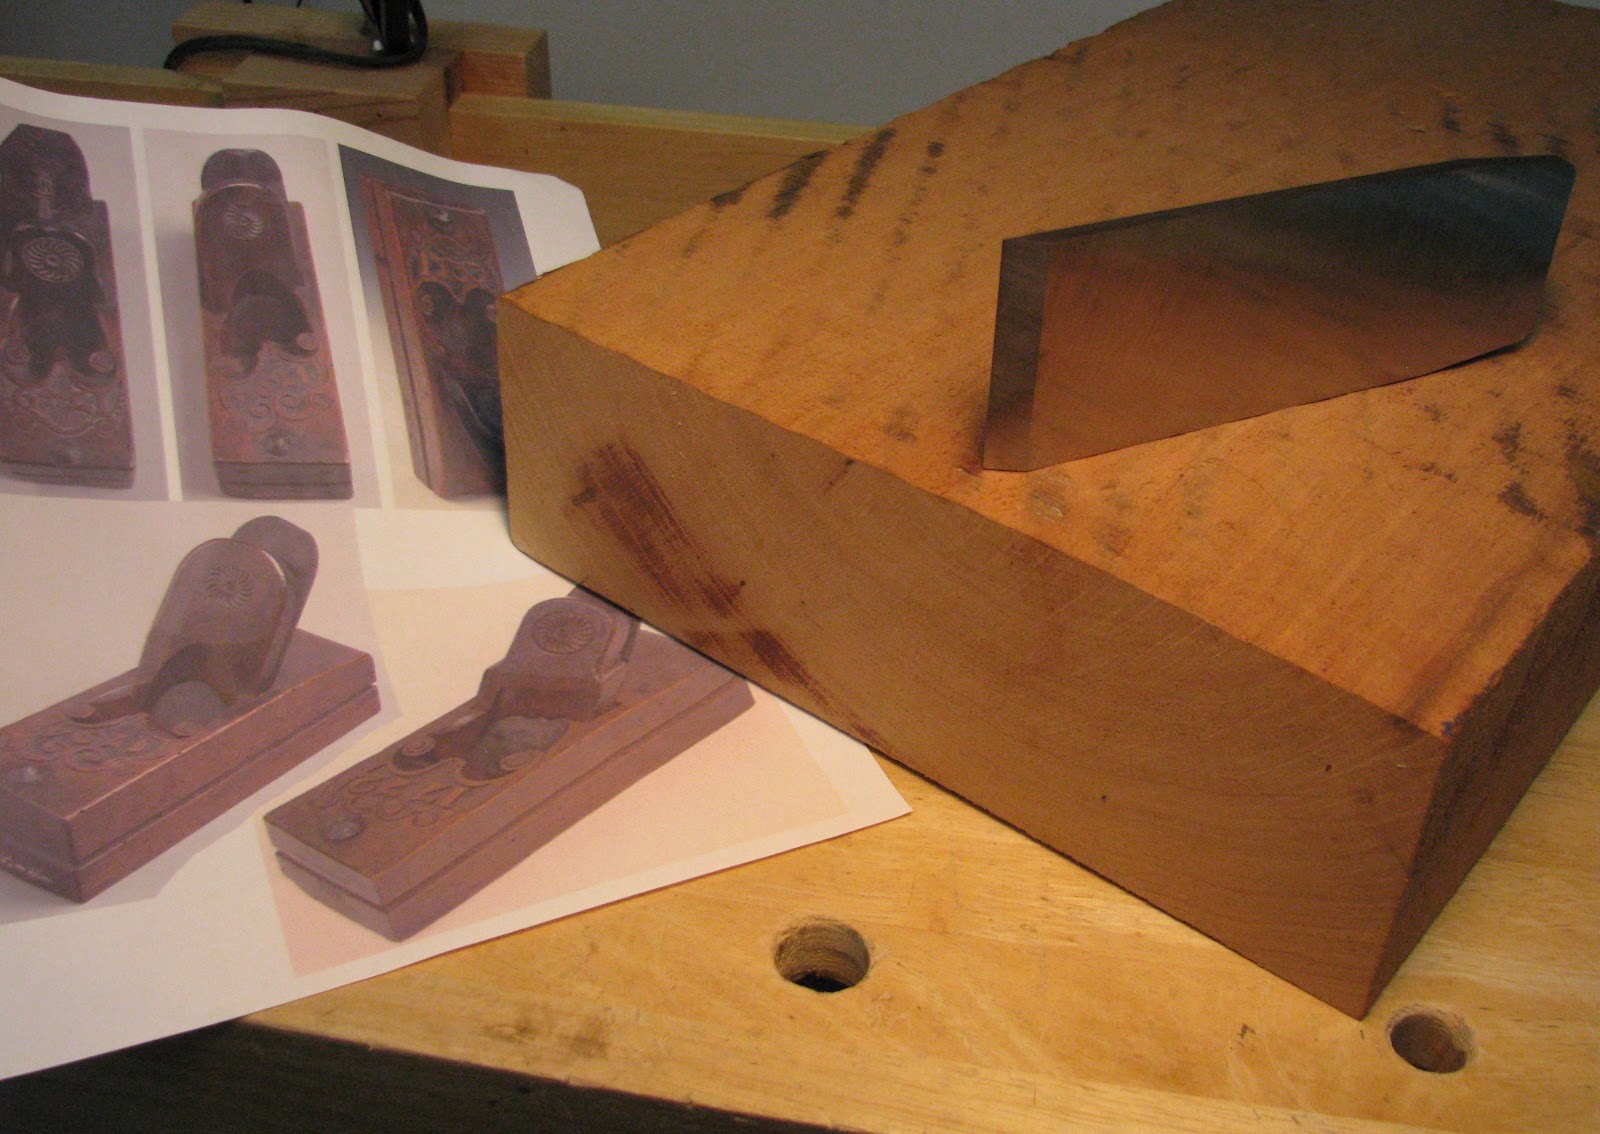
I've been wanting to make a high angle smoother for awhile and was planning to make an18th c. English style coffin smoother, but I've always been drawn to the look of 18th c. Dutch planes with all their scrolly goodness.

In his book The Art of Fine Tools, Sandor Nagyszalanczy explains that small, family-owned shops in the Netherlands cranked out decorative handplanes in the 17th- and 18th-centuries while in England and the colonies, tradesman were making more utilitarian (but still handsome) styles.

Dutch planes were constructed with templates and adhered to standard specifications, but were adorned with varying scroll and other designs by individual craftsmen, making each one unique.

The plane I plan to build is referred to as a blokschaff (smoother). It will have a horn and scrolls, but whether or not it will match the qualifications of its 18th-century archetype remains to be seen.